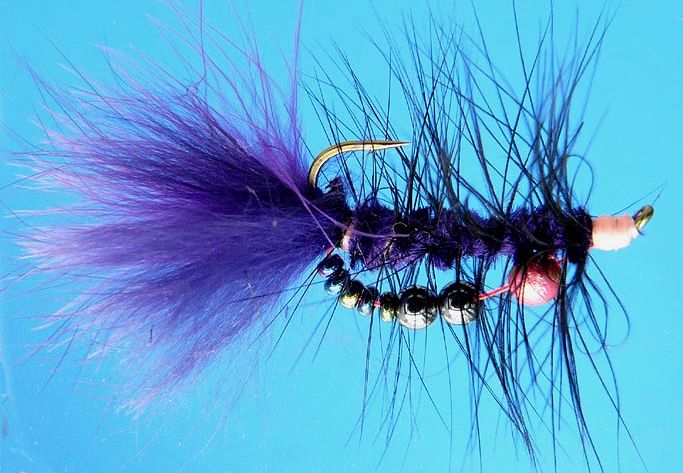
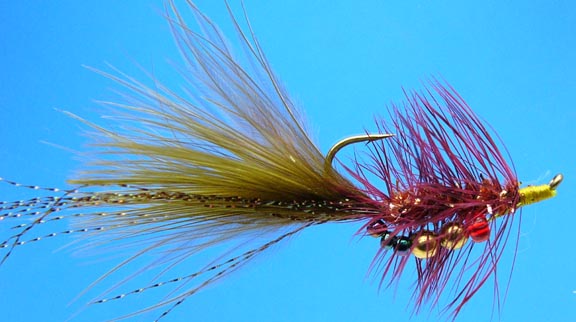
Alaska Flyfishing Online
Fly Tyer's Bench
Alaskan Fly Patterns The NATURAL Imitations

      Eggsucker Bouncer - Woolybugger Bouncer


Some anglers have guessed that more Alaskan fish have been taken with wooly buggers and their variants than with all other flies combined. I wouldn't go that far, but it sure is a killer pattern, especially for rainbows, char and grayling - and plenty of salmon have been caught on these, too. Tying the Bouncer version is very simple; the following instructions are for a purple "egg-sucking" version, size 6. We have gone into some detail regarding the tie-in of the mono in front and back because we have discovered these points are subject to pulling away from the fly after a few fish are caught unless these areas are reinforced properly.

There is no need to use expensive, machined beads for a Bouncer: brass beads of the kind used to make spinners are fine, and glass, hematite and plastic beads from a craft store work well and are very inexpensive. Feel free to modify the flies described below by changing the size, color and number of beads.


Materials:

  1. Hook - 2x or 3x long-shanked nymph hook, size 6 (e.g., TMC 5263)

  2. Keel - 3" of 15-20-lb mono, plus two 1/8 brass beads and two-three small plastic beads;
    (Note: the fly in the photo uses two hematite beads in place of one of the brass beads)

  3. Thread - pink or purple, 6-0 or 3-0

  4. "Egg" - (optional): paint the brass bead that will be placed in front with pink nail polish

  5. Body - purple chenille

  6. Hackle - soft webby, purple or black

  7. Tail - purple marabou plus a strand or two of pearl Krystal Flash (optional)

Abbreviated Instructions:

  1. Paint the brass beads the desired color (pink, purple, black, etc.) and let dry.
  2. Place the hook in the vise normally, with the hookpoint down.
  3. Lash the mono to the top of the hook shank, with one end 1/8" behind the eye, winding the thread down to the start of the bend, with the remaining two inches of mono extending straight to the rear past the hook bend. Reinforce the tie-in at the start of the bend by making 3-4 extra wraps at this point, and add an extra wrap or two going under the mono on the bend side of the reinforcement (this will cock the mono up slightly). Cement well.
    For photos of this step of the construction go to www.BouncerFlies.com.
  4. Make the rest of the wooly bugger as usual, trying to keep the head thin and lean.
  5. Pull the mono around past the eye of the hook and using your fingernail, kink the place where the mono is tied in at the tail so the mono will stick more or less straight up, perpendicular to the shank of the hook.
  6. Load the mono with the two plastic beads and then the brass beads, ending with the pink bead if you are making the egg-sucking version of the BuggerBouncer.
  7. Pull the mono to the eye of the hook with moderate tension and cut off at a length that will result in a slightly curved belly when tied in at the eye.

    Important: ball the end of the mono with the flame of a lighter (or widen with crimping pliers) so the mono is less likely to pull out from under the head wraps. Add a drop of cement to the head windings before tying in the mono, whip finish and cement again.


Pattern by Steve Duckett
Photos by Steve Duckett ©2005


AFO Home
Alaska Flyfishing Online
All Content Copyright ©1996-2005
Visual Media Design, Alaska Outdoor Journal, Alaska Flyfishing Online
All Rights Reserved
AOJ Home
Alaska Outdoor Journal