Alaska Flyfishing Online
Fly Tyer's Bench
Alaskan Fly Patterns The NATURAL Imitations

     
TRIPLE THREAT Articulated Leech


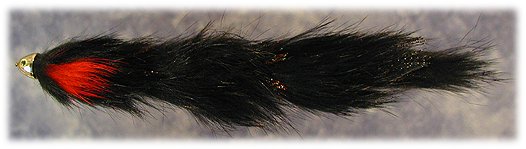
By definition, the articulated leech is two or more flies, joined to make one long, wiggly, artificial. The size in itself is enough to draw attention, but its lifelike swimming motion adds a degree of realism that drives fish nuts. Most often, it's tied in black, but various colors and flashy materials can also be used to create the ultimate attractor.

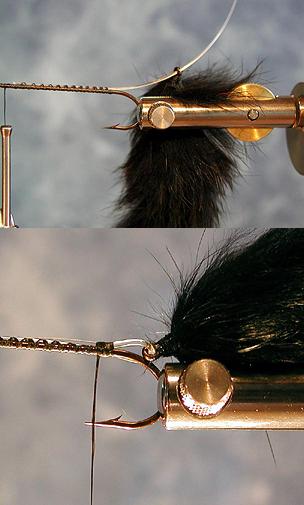
For increased motion on the triple, you can add weight to the head of the first fly, the tail of the second fly, and the head of the third fly. For a double, add weight to the head of the first, and tail of the second. When you fish them with a strip retrieve, they bend at the joints, and then straighten with a strip, resulting in a swimming leech.


Materials:

  1. Hooks - Size 4 long-shank streamer

  2. Thread - Heavy black, e.g. Danville Monocord or Flymaster Plus.

  3. Head - Weighted Conehead. (Optional)

  4. Underbody material - .020 to .030 lead wire. (Optional)

  5. Joint - 30 # monofilament

  6. Body - Stripped Rabbit, black

  7. Gill - Rabbit hair or similar material, red

  8. Body Flash - Flashabou, black. (Optional)

TYING STEPS:

REAR Fly

  1. Cover the shank of the hook with tying thread to form a base.
  2. Tie in the lead wire halfway back from the eye, then wrap the forward one-half of the shank. Using thread, thoroughly wrap the lead to secure.
  3. Tie in small clump of Flashabou at the bend, leaving one-inch extending rearward past the bend as a tail.
  4. Tie in a long piece of stripped rabbit near the bend leaving one inch extending rearward past the bend as a tail. Move thread to the head. Wrap the rabbit strip forward around the shank to just behind the eye. Place 3 or 4 wraps of thread over the rabbit, cut and remove excess.
  5. Place multiple wraps of thread over the cut end of the rabbit behind the eye. Whip finish and cement.

MIDDLE Fly

  1. Repeat step 1 from rear fly.
  2. Tie in a 2-3 inch long piece of 30# monofilament from the eye to the bend with the excess extending rearward. Place multiple wraps of thread over the mono to secure it.
  3. Thread monofilament through the eye of the rear fly, and then bring the excess mono forward forming a loop. Tie down with 5 or 6 wraps near the bend along the top of the shank.
  4. Pull the mono forward through the wraps to draw the rear fly near the tail of the middle fly. (Approx. one-eighth inch loop) Bring the mono forward along the top of the shank to near the eye. Tie off near the eye, cut and remove excess mono.
  5. Apply a few drops of super-glue, or Zap-A-Gap along the entire length of the shank, then firmly wrap with thread to secure the mono to the shank.
  6. Repeat step 2 of rear fly, except, place lead wire on rear one-half of the shank.
  7. Repeat step 3 of rear fly.
  8. Repeat step 4 of rear fly.
  9. Repeat step 5 of rear fly.

FRONT FLY

  1. Place weighted conehead on shank.
  2. Repeat step 1 of rear fly.
  3. Repeat step 2 of middle fly.
  4. Repeat step 3 of middle fly. (Eye of middle fly)
  5. Repeat step 4 of middle fly.
  6. Repeat step 5 of middle fly.
  7. Repeat step 3 of rear fly.
  8. Repeat step 4 of rear fly.
  9. Tie in a small clump of red rabbit for gills along each side of the shank behind the conehead. Place multiple wraps of thread to secure.
  10. Whip finish and cement.
 

Pattern by Brad Hanson
Photo by B. Hanson ©2003


AFO Home
Alaska Flyfishing Online
All Content Copyright ©1996-2005
Visual Media Design, Alaska Outdoor Journal, Alaska Flyfishing Online
All Rights Reserved
AOJ Home
Alaska Outdoor Journal